Get OpenRMF® OSS v1.13 or higher Running
Please read the Minimum Requirements for OpenRMF® OSS before you get going. Know that starting with v1.9 we are using docker compose versus docker-compose as the docker executable with the compose plugin can be used all-in-one.
And this version of OpenRMF® OSS now supports podman and podman-compose as well by updating the YML and setup!
If you are upgrading from a version 1.8.x or earlier of OpenRMF® OSS you will need to at least do the Keycloak setup listed here. And please clear your web cache as the openrmf.js file has also been updated with version 1.9 and higher.
Note that for Docker Desktop users, you need to have the File Sharing turned on to run OpenRMF® OSS the way it is designed in the docker-compose file. We use persistent volumes for MongoDB, Grafana, and Prometheus. Also for anyone running on a system with any firewall (Windows Firewall, firewalld, iptables) you will need to have ports 8080 accessible from external if you are not doing everything locally on the same box. If you plan to access the web interface from another connected machine, please ensure your firewall settings allow these ports coming in first.
Tested with Docker Desktop 2.x onward with 6 CPUs, 8 GB RAM, 1 GB swap and 60 GB Disk Image. You will want more than the default 2 CPU and 2 GB RAM to maximize the use of OpenRMF® OSS specifically. Your machine age and hardware will make this vary some. If you see timeouts on Keycloak and OpenRMF® OSS when uploading, running reports, or web UI screens taking a long time to load you may want to check the Docker Desktop Resources of your machine.
Step 1 - Setup your .env file
To run OpenRMF® OSS you need to edit your .env file and replace the xxx.xxx.xxx.xxx with your IP address or DNS name of your host machine. Then save and exit.
_DO NOT USE
localhostor127.0.0.1because in containerland, that means “yourself”._
COMPOSE_IGNORE_ORPHANS=True
JWTAUTHORITY=http://xxx.xxx.xxx.xxx:8080/auth/realms/openrmf
JWTCLIENT=openrmf
Step 2 - Setup your .grafana file
To run OpenRMF® OSS you need to edit your .grafana file and replace the xxx.xxx.xxx.xxx with your IP address or DNS name of your host machine. Then save and exit.
_DO NOT USE
localhostor127.0.0.1because in containerland, that means “yourself”._
GF_SERVER_DOMAIN=xxx.xxx.xxx.xxx
GF_SERVER_ROOT_URL=%(protocol)s://%(domain)s:%(http_port)s/metrics/
GF_SECURITY_ADMIN_PASSWORD=xxxxxxxxxxxxxxxxxxx
GF_SERVER_HTTP_PORT=3000
GF_SECURITY_LOGIN_REMEMBER_DAYS=0
Step 3 - Start the OpenRMF® OSS Software Stack
if you are running
podmanversusdockerrunsed -i "s|docker compose|podman-compose|g" *.shon the machine inside the./installation directory for the script to work correctly.
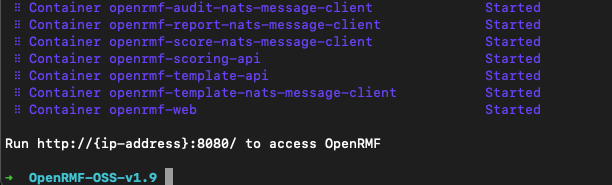
Run ./start.sh to start the software stack. If you do not have the images locally, it will pull from docker.io and download then spin up all the containers within the docker-compose.yml file.
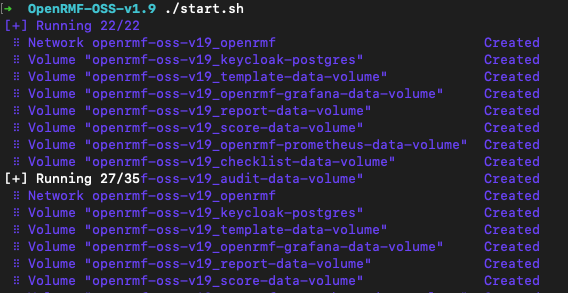
When done it will tell you to go to the starting URL to use it as pictured in the screenshot below.
But first, you must setup Keycloak for the AuthN/AuthZ of OpenRMF® OSS.
Step 4 - Setup Keycloak
if you are running
podmanversusdockerrunsed -i "s|docker |podman |g" *.shon the machine inside the./keycloak/directory for the script to work correctly. Or you can alias thedockercommand topodman.
From wherever your connecting into
Make sure port 8080 on your machine is allowed to run, it not running anything else, and is not blocked by firewall from any external machine that wants to use your OpenRMF® OSS to connect.
Run the ./setup-realm-linux.sh or similar command for your OS and let it start up. It will ask you for:
- your DNS or IP address so enter it correctly
- your initial username for the application administrator account (you will setup the password later)
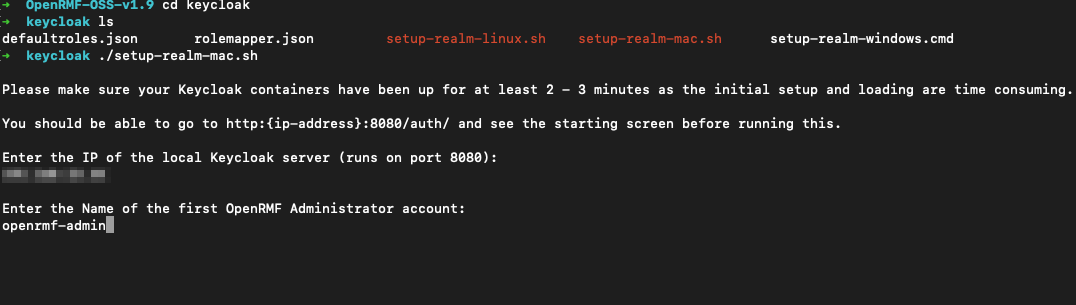
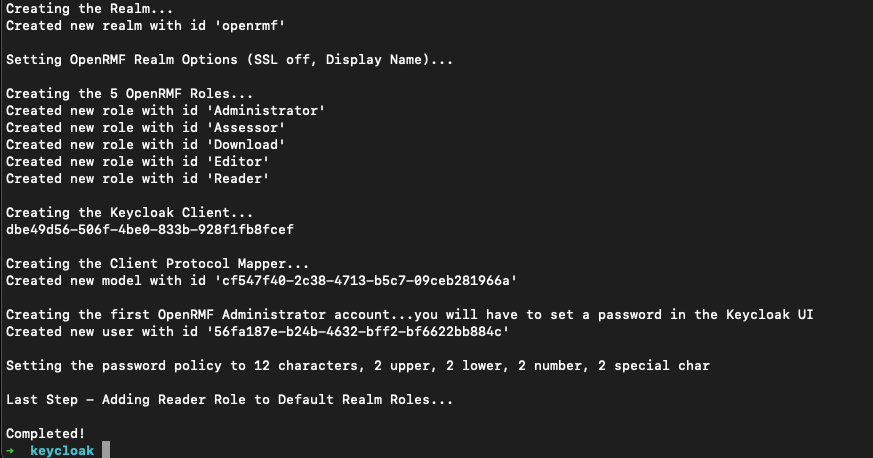
Press enter after that and the script will update roles, client configuration, protocols, password policy and default information. When done it will look like the below and be ready for you to log into Keycloak to finish the configuration steps.
Step 5 - Configure Keycloak
Note that now in OpenRMF® OSS v1.9 or later, EVERYTHING RUNNING is under a single port and single YML file.
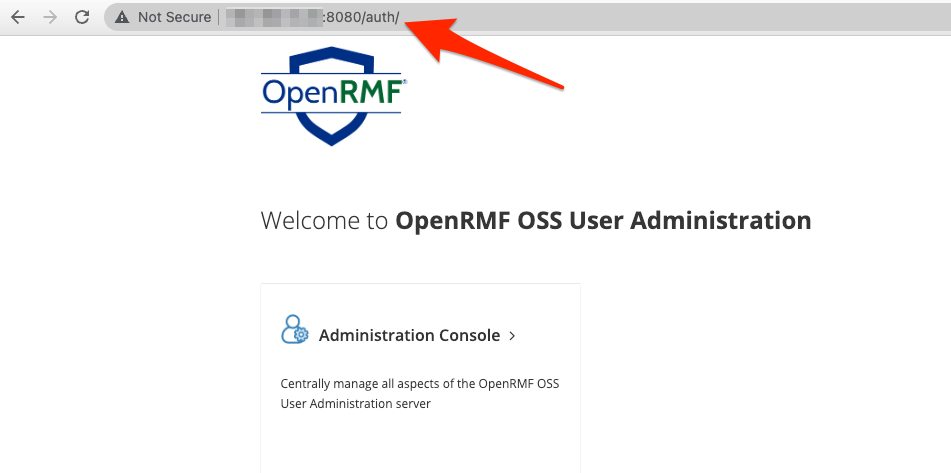
To connect to Keycloak, now you go to the http://<ip-address-or-dns>:8080/auth/ URL (port 8080 slash auth slash) and the screen below comes up. Click the Administration Console and then log in with the default admin login and PWD found in the YML file.
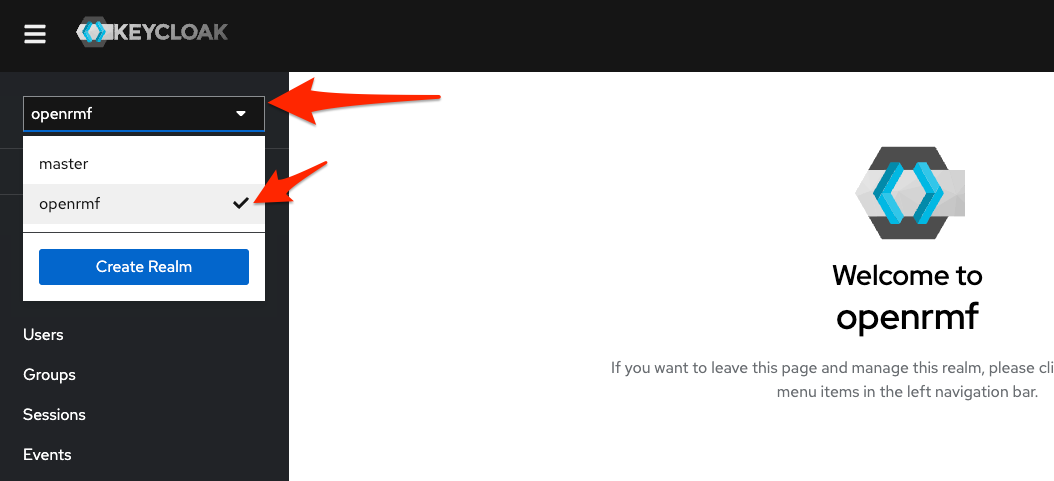
Once here, click on the top left area where it has Manage Realms and then in the listing choose openrmf to let the screen go to our realm.
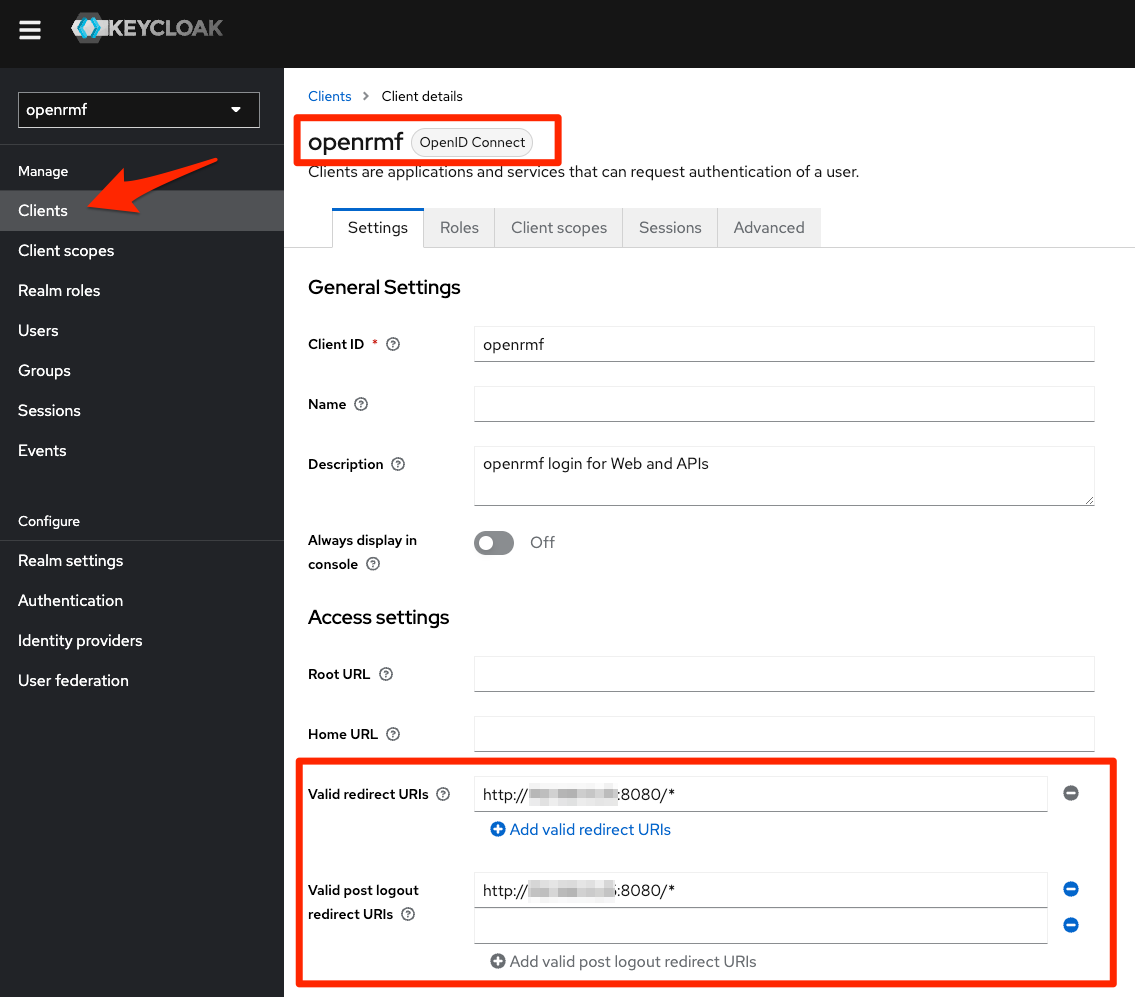
From there, click the Clients menu on the left and then click openrmf in the list of clients to get to the below screen. From here, scroll down a bit and under the highlighted area show below for “Valid redirect URIs” and “Valid post logout redirect URIs” enter your URL http://<ip-address-or-dns>:8080/* and make sure it ends in the ` * `.
That will say “this realm can be used by any application coming from this address as the root for login/logout” in essence.
We tell folks to click the “+ Add valid redirect URIs” button underneath each so they are set correctly. Then scroll down to click the Save button and you are good here.
Almost there…now on to setup that application administrator user password and get ready to log in.
Step 6 - Configure Keycloak Users
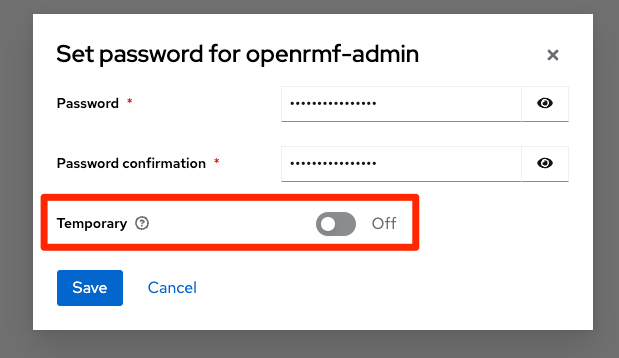
Click on the Users menu on the far left, and then find the user you made in Step 4 above. You should be able to see it in the listing. Click on that user (in the example below created a user ` openrmf-admin `) and then note you should enter the email, first name, and last name information and save it here.
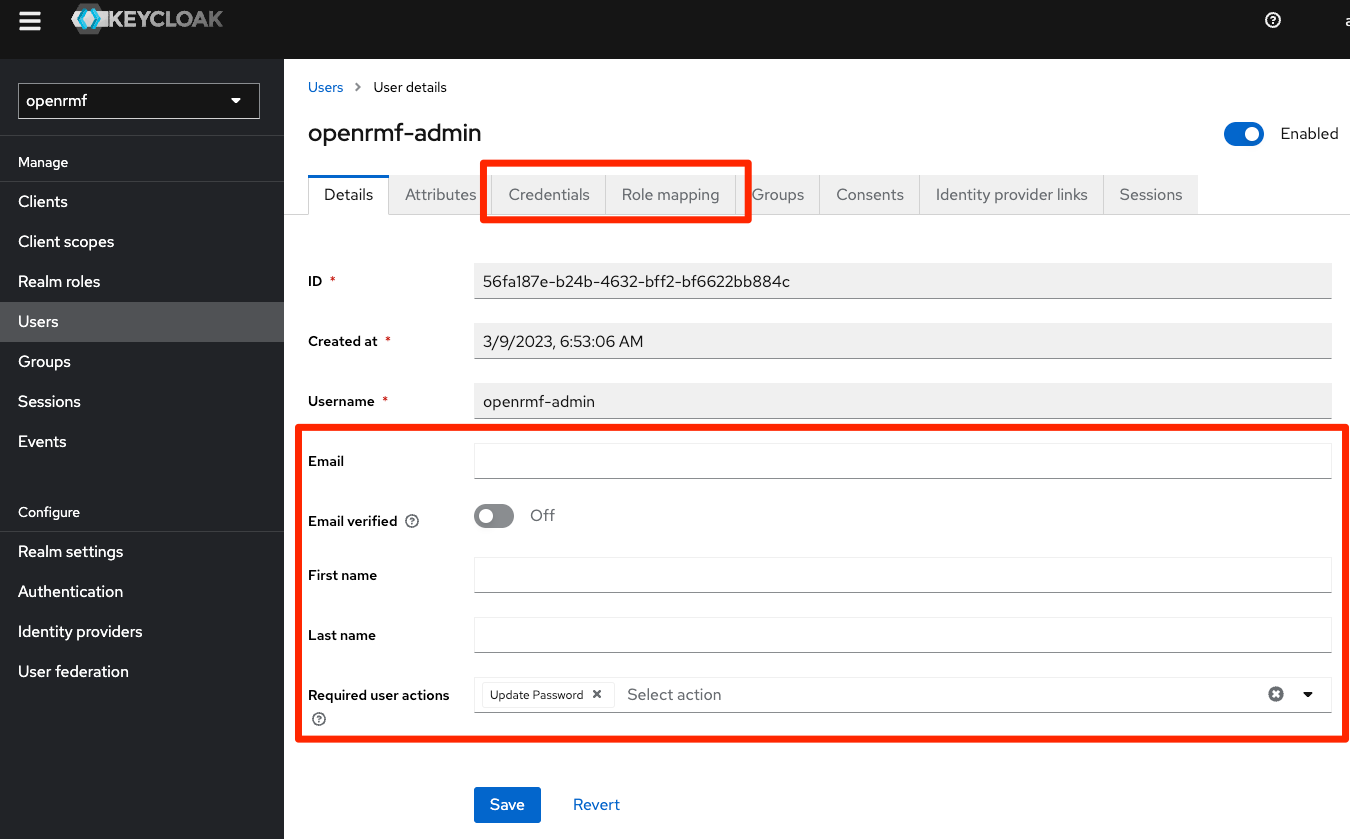
Then click on the Credentials tab and set your first password. Make sure the “Temporary” slider is off or you will have to change it AGAIN when you first login. Save the password and now you are set to go.
The password policy is 2/2/2/2 and minimum 12 characters by default. The exercise to find that and update it we leave to you! Learning how Keycloak works is a great exercise.
Step 7 - Login and Use!
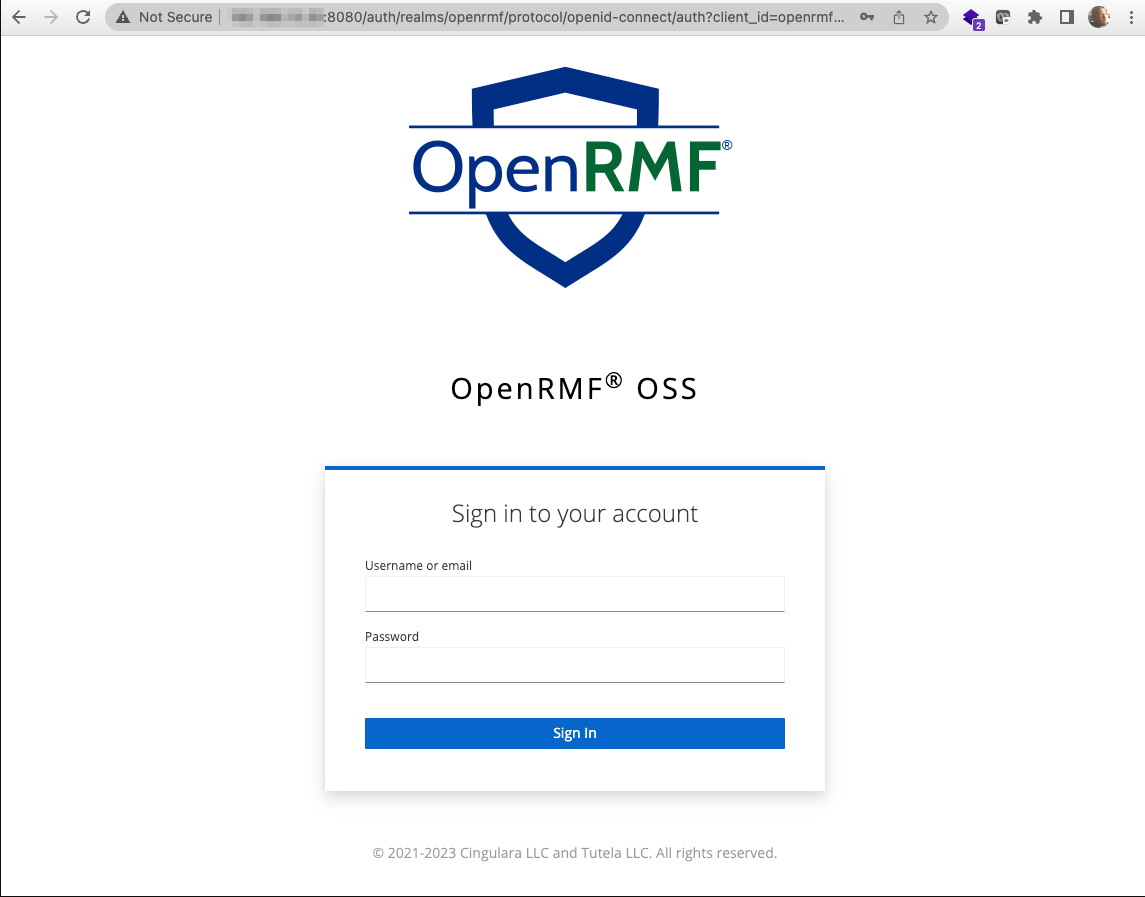
In a separate browser tab (you can leave the Keycloak one up and running to learn it) go to that URL you setup enter your URL http://<ip-address-or-dns>:8080/ and you should get the image below.
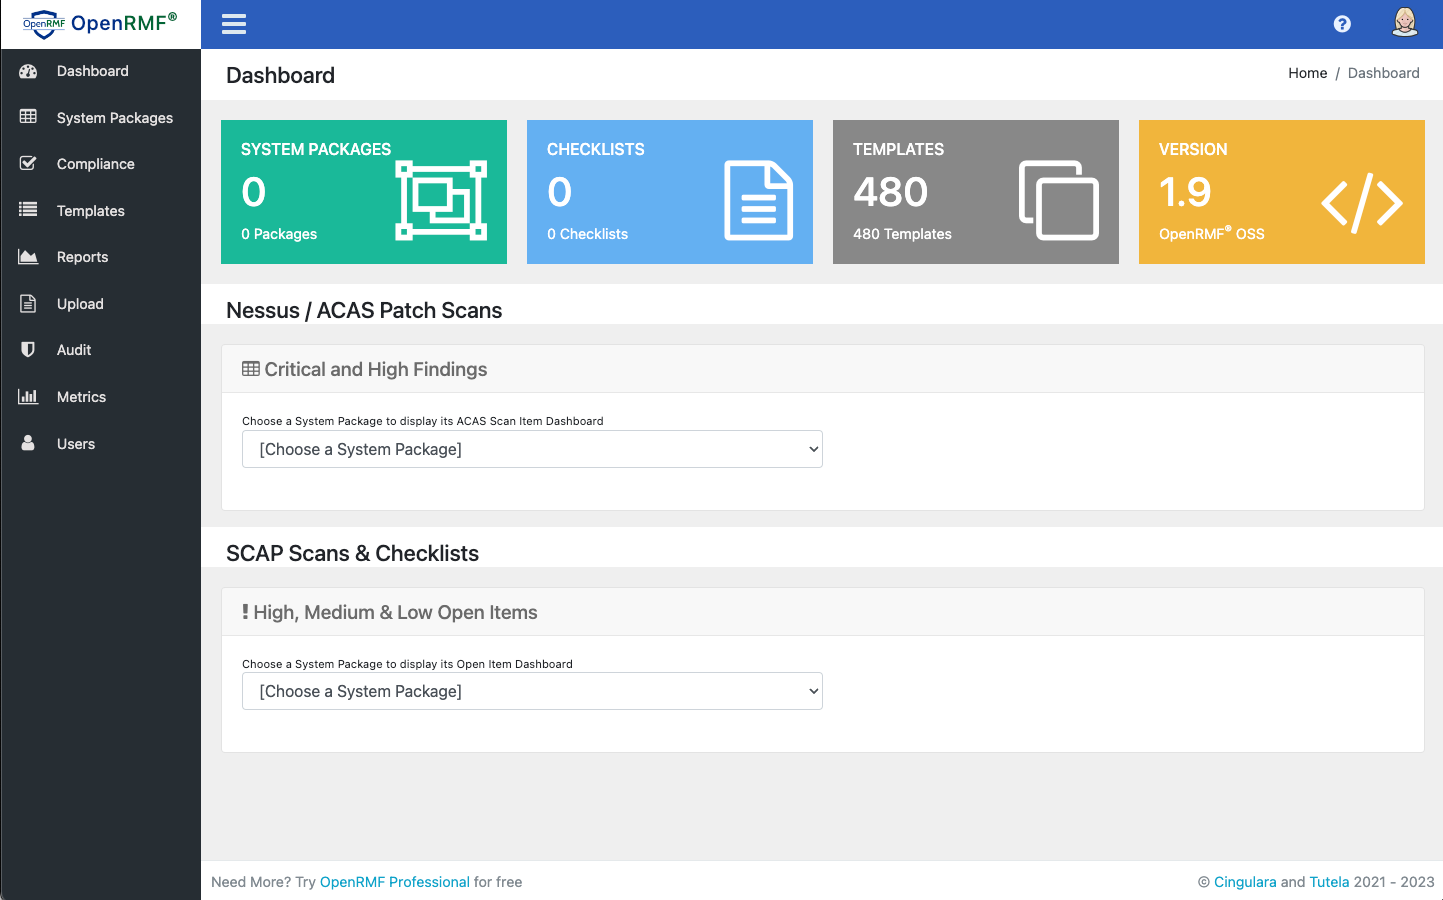
Log in with that initial application administrator login/pwd combination and you should see the main page of OpenRMF® OSS ready for you!
Step 8 - Use OpenRMF® OSS
From here, now you can create System Packages, upload checklist CKL files, upload raw SCAP XCCDF results .xml files and get organized around your RMF package.
A System Package here = an ATO, accreditation boundary, etc. that has all your checklists, patch vulnerability scans, SCAP scans, etc. where you are looking for approval to run. And where you probably are doing some kind of ConMon (continuous monitoring) as well.
For the first setup:
- click System Package
- add a System Package
- on the System Package Dashboard click Upload
- load up some CKL or SCAP XCCDF .xml files
- go back to the System Packages
- see results
A Note on OpenRMF® Professional
OpenRMF® OSS is free to use, reuse, install all over the place, etc. You just cannot charge people to install or use it. This application will be free to use as long as we are in charge of it.
While using it, if you need more than the OSS version, check out OpenRMF® Professional.
- automated install or OVA install
- support, helpdesk, video on demand training platform
- Track RMF, FedRAMP, CMMC, CSF, GovRAMP and other cyber compliance frameworks
- more fidelity on security and permissions per system package
- custom checklist templates
- CIS scans
- Parsing patch vulnerabilities for hardware, software, PPSM
- history and trends
- deeper level of security on system packages
- live POAM
- bulk editing and locking vulnerabilities and checklists
- Compliance down to the subcontrol level, overlays, tailoring, compliance statements
- Generate SSP, SAR, RAR, CCRI documents
- add in tracking of other vulnerabilities (software, container, infrastructure-as-code, etc.)
- and more…